Getting started with Khadas VIM3

Khadas VIM3 – a single board computer like a Raspberry Pi or Jetson Nano – but with more powerful processors.

Uses Amlogic A311D SoC and includes a neural processing unit for accelerating machine learning models and AI computations

Ideal for embedded computer vision or deep learning projects!

Installing Linux

The VIM3 comes with an Android OS pre-loaded which we need to replace for Linux. Khadas have good documentation for how to do this.

First setup a workspace for Khadas on the host machine (Ubuntu 20).

cd ~
mkdir Khadas
cd Khadas

Choosing OS Image

The first step is to choose an OS. Some decisions to make:

  • What kernel to use: can choose between the older more stable 4.9 kernel, or the latest (less stable?) mainline kernel.
  • Where to store the OS on the board: can install the image on an SD card and insert it into the slot, or, can flash the OS directly to the onboard storage. The onboard eMMC is faster and more stable than SD cards.
  • Whether to have command line only or install the desktop GUI: we wanted the full desktop as we will want to be able to use the GUI when out and about.

This case: use the VIM3_Ubuntu-gnome-focal_Linux-4.9_arm64_EMMC_V1.0.9-211217 image as we want the desktop Ubuntu installed in eMMC with 4.9 kernel.

Flashing OS Image

Make a separate directory for OS images and download the image

mkdir images
curl https://dl.khadas.com/Firmware/VIM3/Ubuntu/EMMC/VIM3_Ubuntu-gnome-focal_Linux-4.9_arm64_EMMC_V1.0.9-211217.img.xz --output images/VIM3_Ubuntu-gnome-focal_Linux-4.9_arm64_EMMC_V1.0.9-211217.img.xz

extract the the file using unxz.

unxz images/VIM3_Ubuntu-gnome-focal_Linux-4.9_arm64_EMMC_V1.0.9-211217.img.xz

To load the OS image onto the board we need the Khadas burning tool. Install the dependencies for disk tools first.

sudo apt-get install libusb-dev git parted

Then download the Khadas utils repository using git

git clone https://github.com/khadas/utils
cd utils

Then to setup the imaging tool:

sudo ./INSTALL

To flash the image and load the new OS, the board needs to be booted into upgrade mode.

  1. Connect the board to the host PC using the USB C connection.
  2. After its connected, wait for the board to boot up and its red LED to light up.
  3. Find the power button and reset button. Power is one of the 3 buttons, closest to the GPIO pins. Reset is one of the 3 buttons, closest to the USB port.
  4. While holding the power button, click the reset button, and continue to hold the power button for 3 seconds afterwards.
  5. The LED should blink and end up white.
  6. To confirm the board is in upgrade mode, type
lsusb | grep Amlogic

Should see something like:

BUS 002 Device 036: ID 1b8e:c003 Amlogic, Inc.

Otherwise, do the upgrade mode sequence again. When you can see the Amlogic listed like above, run the burn tool.

burn-tool -v aml -b VIM3 -i ../images/VIM3_Ubuntu-gnome-focal_Linux-4.9_arm64_EMMC_V1.0.9-211217.img

Should see output like:

dan@antec:~/Khadas/utils$ burn-tool -v aml -b VIM3 -i ../images/VIM3_Ubuntu-gnome-focal_Linux-4.9_arm64_EMMC_V1.0.9-211217.img
Try to burn Amlogic image...
Burning image '../images/VIM3_Ubuntu-gnome-focal_Linux-4.9_arm64_EMMC_V1.0.9-211217.img' for 'VIM3/VIM3L' to eMMC...
Rebooting the board ........[OK]
Unpacking image [OK]
Initializing ddr ........[OK]
Running u-boot ........[OK]
Create partitions [OK]
Writing device tree [OK]
Writing bootloader [OK]
Wiping  data partition [OK]
Wiping  cache partition [OK]
Writing logo partition [OK]
Writing rootfs partition [OK]
Resetting board [OK]
Time elapsed: 8 minute(s).
Done!
Sat 19 Feb 17:45:01 GMT 2022

Running object detection on the NPU

Follow the Tengine docs

Getting started with Tengine

Tengine

A cross platform machine learning deployment solution.

Enable fast and efficient deployment of deep learning neural network models on embedded devices.

Uses a separated front-end/back-end design. I.e. a single model can be transplanted and deployed onto multiple hardware platforms like CPU, GPU, NPU and so on.

Code once, run anywhere – and make use of acceleration.

We want to develop on x86, and deploy to ARM and NPU accelerator.

Tengine logo

Installation

Follow these steps for installing Tengine.

Make a workspace and then download the Tengine code:

cd ~
mkdir Tengine
cd Tengine
git clone -b tengine-lite https://github.com/OAID/Tengine.git

Then setup a build directory to store the compiled files:

cd Tengine-Lite
mkdir build 
cd build

Then build the files. Use -j 12 when calling make to use multi-core and speed up compilation. Change 12 to however many threads/cores the PC has.

cmake ..
make -j 12
make install

Confirm the installation was okay by using tree.

sudo apt-get install tree
tree install

The output should look like this

install
├── bin
│   ├── tm_classification
│   ├── tm_classification_int8
│   ├── tm_classification_uint8
│   ├── tm_efficientdet
│   ├── tm_efficientdet_uint8
│   ├── tm_landmark
│   ├── tm_landmark_uint8
│   ├── tm_mobilefacenet
│   ├── tm_mobilefacenet_uint8
│   ├── tm_mobilenet_ssd
│   ├── tm_mobilenet_ssd_uint8
│   ├── tm_retinaface
│   ├── tm_ultraface
│   ├── tm_yolofastest
│   └── tm_yolov5
├── include
│   └── tengine
│       ├── c_api.h
│       └── defines.h
└── lib
    ├── libtengine-lite.so
    └── libtengine-lite-static.a

Test inference

The examples page walks through running Tengine demos.

First make a folder to store the models in the root of the Tengine directory.

cd ~/Tengine/Tengine-Lite
mkdir models
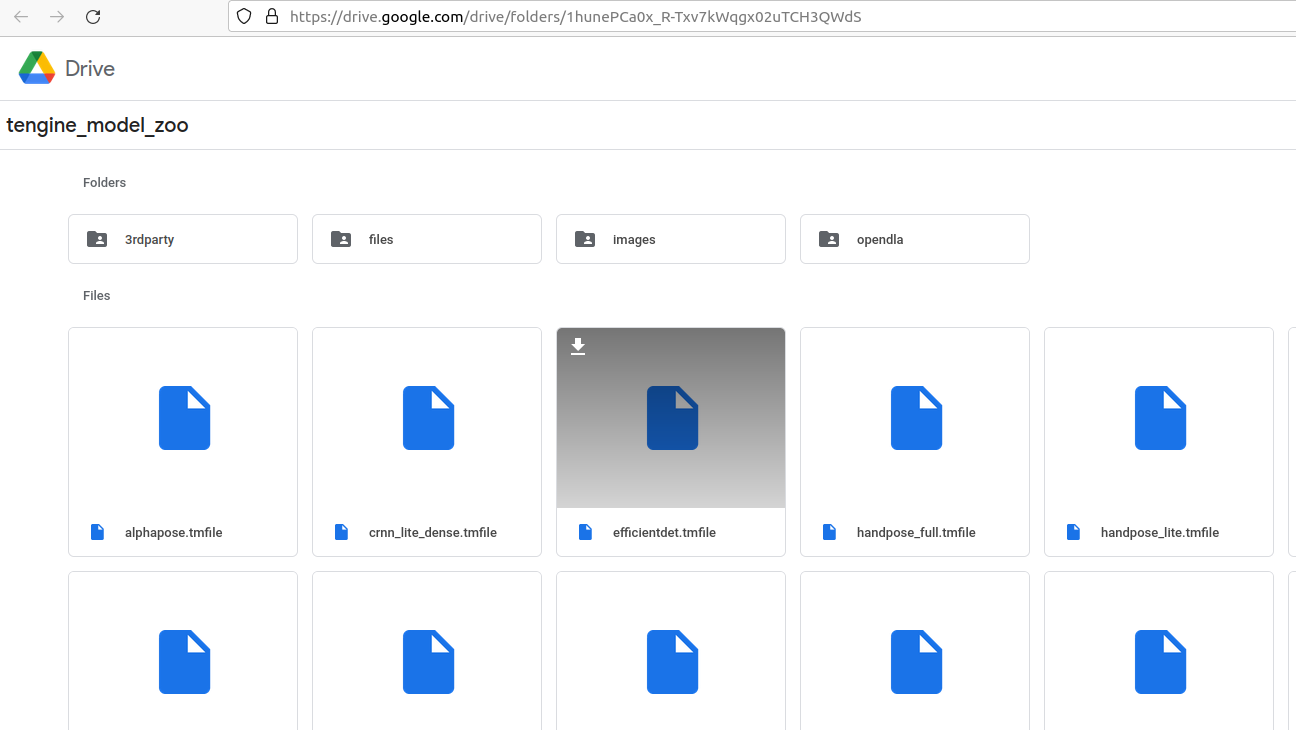
  • Download the efficientdet.tmfile model from the model zoo. Save it in to the models directory.
Download the model from the Google drive model zoo

Create another folder to store our test images.

mkdir images

Then download an image to detect, e.g.

curl https://camo.githubusercontent.com/beb822ba942ae1904a1355586fd964b8a2374a6ebf31a1e10c1cf41243e3d784/68747470733a2f2f7a332e617831782e636f6d2f323032312f30362f33302f5242566471312e6a7067 --output images/ssd_dog.jpg
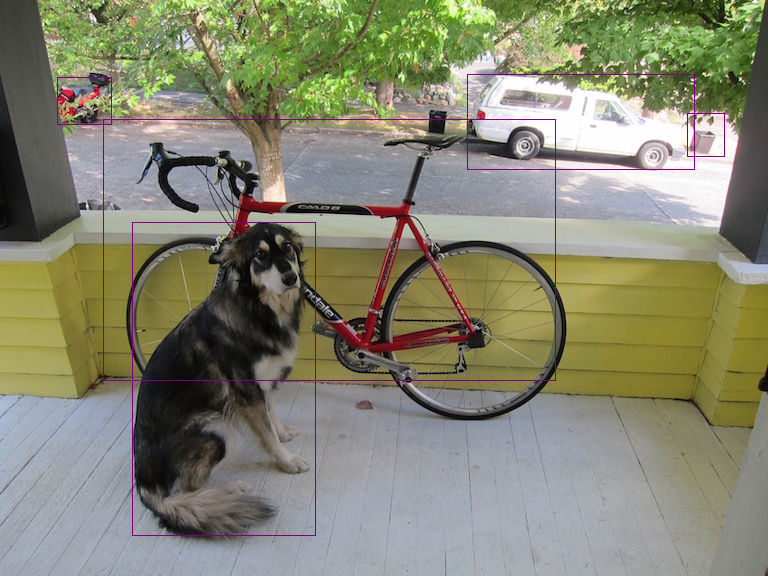
the dog

Use the command from the example – it exports the path for the Tengine-library first, and then runs the detector.

export LD_LIBRARY_PATH=./build/install/lib
./build/install/bin/tm_efficientdet -m models/efficientdet.tmfile -i images/ssd_dog.jpg -r 1 -t 1

Should see some output – the detector worked successfully.

dan@antec:~/Tengine/Tengine-Lite$ ./build/install/bin/tm_efficientdet -m models/efficientdet.tmfile -i images/ssd_dog.jpeg -r 1 -t 1

Image height not specified, use default 512
Image width not specified, use default  512
Scale value not specified, use default  0.017, 0.018, 0.017
Mean value not specified, use default   123.7, 116.3, 103.5
tengine-lite library version: 1.5-dev

model file : models/efficientdet.tmfile
image file : images/ssd_dog.jpeg
img_h, img_w, scale[3], mean[3] : 512 512 , 0.017 0.018 0.017, 123.7 116.3 103.5
Repeat 1 times, thread 1, avg time 512.70 ms, max_time 512.70 ms, min_time 512.70 ms
--------------------------------------
17:  80%, [ 132,  222,  315,  535], dog
 7:  73%, [ 467,   74,  694,  169], truck
 1:  42%, [ 103,  119,  555,  380], bicycle
 2:  29%, [ 687,  113,  724,  156], car
 2:  25%, [  57,   77,  111,  124], car
the dog with detection’s

Parsing Command Line Arguments in C

The getopt API can help us parse command line arguments in C.

Its included with C so we only need to “#include <unistd.h> at the top and then configure how we want to parse the arguments.

The getopt function takes argc and argv as initial arguments, and then we specify in the third what characters to use as options. E.g. If we specify “a” then the user can specify an option “-a” on the command line.

getopt(argc, argv, "a")
./some_program -a

If we specify “abc”, then the user can specify -a, -b or -c on the command line. E.g.

getopt(argc, argv, "abc")
./some_program -a -b -c

If we want to specify a value for an argument then we add a colon after the character. E.g.

getopt(argc, argv, "a:b:c:")
./some_program -a "argument for a" -b "argument for b" -c "argument for c"

The getopt function returns either the character of the option it has just parsed, or if there are no arguments then it returns -1. The specified value given with each argument is stored in optarg. We combine this with a switch case to act on the arguments given.

#include <stdio.h>
#include <stdlib.h>
#include <stdbool.h>
#include <unistd.h> // getOpt functions

int main(int argc, char *argv[]) {

    printf("Running parser test\n"); fflush(stdout);

    int opt; // i.e. option

    int input_number = 0;
    int output_number = 0;
    bool switch_on = false;
    
    while ((opt = getopt(argc, argv, "i:o:s")) != -1) {
        switch (opt) {
            case 'i':
                input_number = atoi(optarg);
                break;
            case 'o': 
                output_number = atoi(optarg);
                break;
            case 's':
                switch_on = true;
                break;
            default:
                fprintf(stderr, "Usage: %s [-i] [input number] [-o] [output number] [-s]\n", argv[0]);
                exit(EXIT_FAILURE);
        }
    }

    printf("The user specified %d as the input number\n", input_number);
    printf("The user specified %d as the output number\n", output_number);
    printf("The switch is %d\n", switch_on);

    return 0;
}

Adding a USB Speaker to Raspberry Pi

I bought a simple USB speaker for my raspberry pi. I plugged it in and… it didnt work. Here is how to configure it.

Use arecord to record a sample, then use aplay to play it back and test the audio output. In my case the sound comes out the headphones but not the USB speaker.

arecord -Dac108 -f S32_LE -r 16000 -c 4 hello.wav
aplay hello.wav

In the home or root folder (e.g. home/pi/) there is file called .asoundrc which describes the audio configuration.

cd ~
sudo nano .asoundrc

This should bring up nano with a file like this:

pcm.!default {
  type asym
  playback.pcm {
    type plug
    slave.pcm "output"
  }
  capture.pcm {
    type plug
    slave.pcm "input"
  }
}

pcm.output {
  type hw
  card 0
}

ctl.!default {
  type hw
  card 0
}

Notice the card attributes are set to 0. Exit .asoundrc and then use aplay to list the available output devices

# Ctrl + X
aplay -l

You should see something like this…

pi@raspberrypi:~ $ aplay -l
**** List of PLAYBACK Hardware Devices ****
card 0: Headphones [bcm2835 Headphones], device 0: bcm2835 Headphones [bcm2835 Headphones]
  Subdevices: 8/8
  Subdevice #0: subdevice #0
  Subdevice #1: subdevice #1
  Subdevice #2: subdevice #2
  Subdevice #3: subdevice #3
  Subdevice #4: subdevice #4
  Subdevice #5: subdevice #5
  Subdevice #6: subdevice #6
  Subdevice #7: subdevice #7
card 1: Device [USB2.0 Device], device 0: USB Audio [USB Audio]
  Subdevices: 1/1
  Subdevice #0: subdevice #0

Here it says card 0 is the headphones, and the USB is card 1. In the configuration file the cards are set to 0 i.e. the headphones.

We need to change asoundrc to use card 1. Go back into .asoundrc in nano and change it.

sudo nano .asoundrc
pcm.!default {
  type asym
  playback.pcm {
    type plug
    slave.pcm "output"
  }
  capture.pcm {
    type plug
    slave.pcm "input"
  }
}

pcm.output {
  type hw
  card 1
}

ctl.!default {
  type hw
  card 1
}

Exit Nano and save it, then test it again. Using aplay hello.wav. If there is still no sound try and change the volume using the alsamixer

aplay hello.wav
alsamixer