First install CUDA 10.1. Go to the releases page for NVIDIA and download the installer for Cuda 10.1, Windows 10.
After the installer has finished, download CUDNN 7.5 from the NVIDIA archive and install into cuda 10.1. To install, extract the CUDNN download and then copy the CUDNN bin file to the CUDA 10.1 bin directory, the CUDNN include file into the CUDA include directory, and the CUDNN lib file into the CUDA lib directory.
Now open a PowerShell in the C: drive or wherever we want to install OpenPose and enter:
git clone https://github.com/CMU-Perceptual-Computing-Lab/openpose
cd openpose
There are a few submodules in the OpenPose code that do not download automatically (like pybind, clang and caffe modules). We need to issue an extra command to download the submodules.
git submodule update --init --recursive
To configure and compile OpenPose use CMake (I used 3.17), so download and install that; and we also need the Visual Studio 2017 compiler tools so download and install that as well. If you already have Visual Studio installed you should be able to use the Visual Studio installer to install 2017 tool chains. Also for this to work with Python we need to make sure that our Python interpreter is installed, I have Anaconda installed, CMake should find it automatically.
CMake is used to configure and prepare the software for our system before it is run through a compiler and turned into executables. Open CMake and click “browse source” button to set the location of the OpenPose code. E.g. select E:\OpenPoseDemo\openpose. Then click “browse build” to set the specify where to save the compiled code. Standard practice is to save the compiled executables to a folder called “build” inside the root directory of the OpenPose code. I.e. make a new folder in the E:\OpenPoseDemo\openpose directory called “build”, then select E:\OpenPoseDemo\openpose\build as the location to build the binaries.
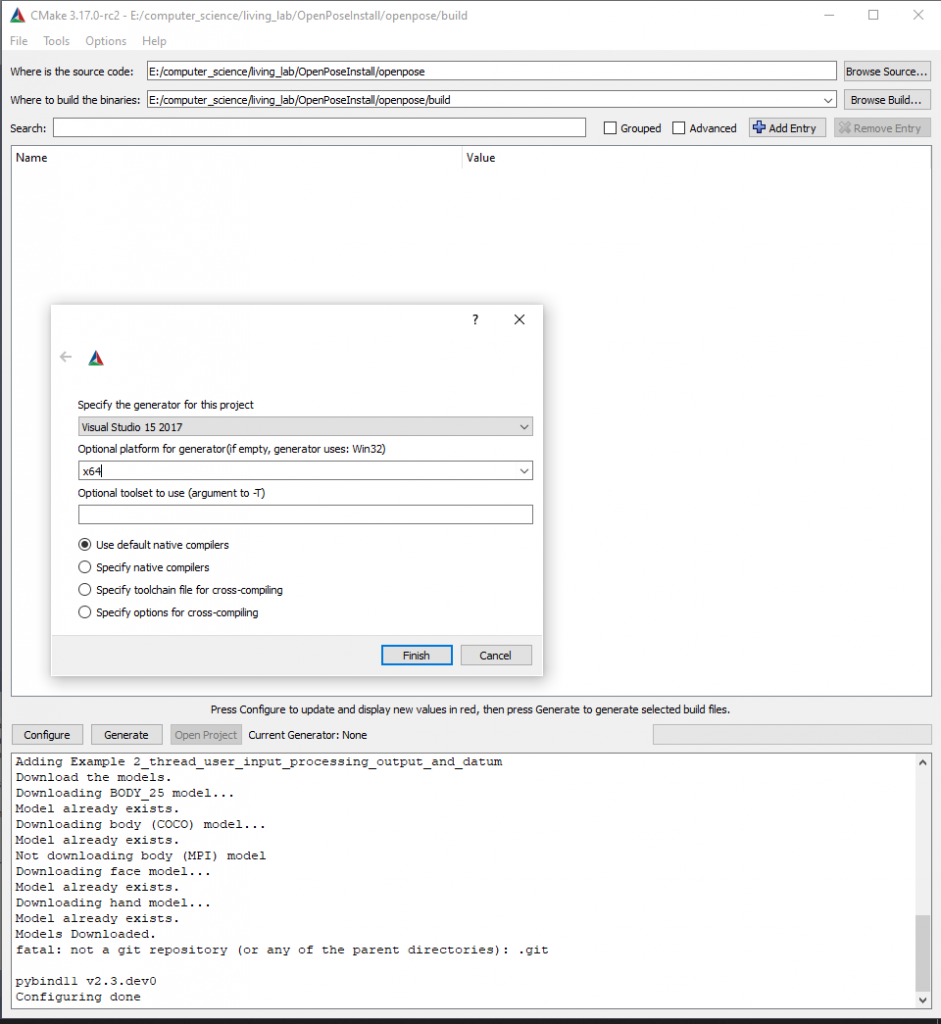
Click the configure button and select VS 2017 as our generator, x64 as the platform, leave the last entry blank and use default native compilers. The CMake program will use the make files in the repo to configure and download any extra dependencies and files.
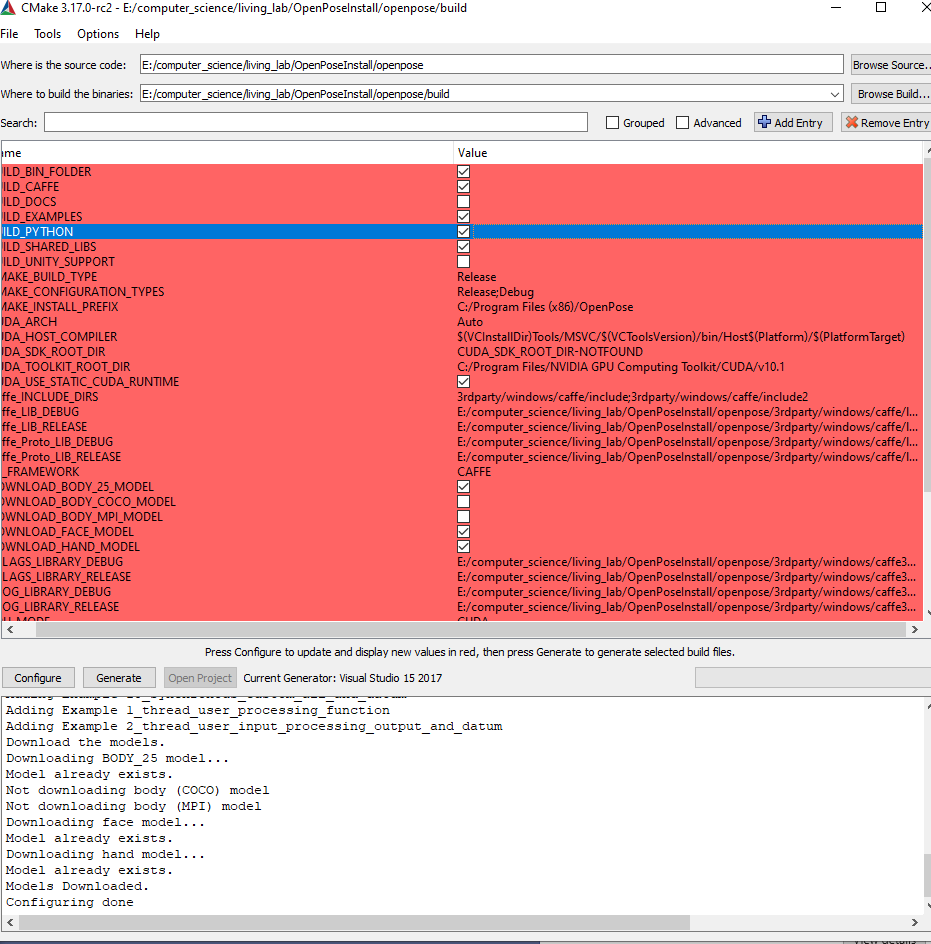
When the configuration is done CMake should be populated with parameters of the build. We want to build the Python API so find the BUILD_PYTHON option and enable it by clicking the tickbox. I also wanted the COCO 18 point estimation model so I checked the DOWNLOAD_BODY_COCO_MODEL option. Then click Generate to prepare the software for compilation. It will take a while to download the extra models as well.
Assuming there were no errors, we should be able to click the Open Project button which will open up Visual Studio with the configured OpenPose code for compilation. Next to the green play button use the drop down to set to “release” mode and “x64” mode then in the tool bar click build -> build solution.

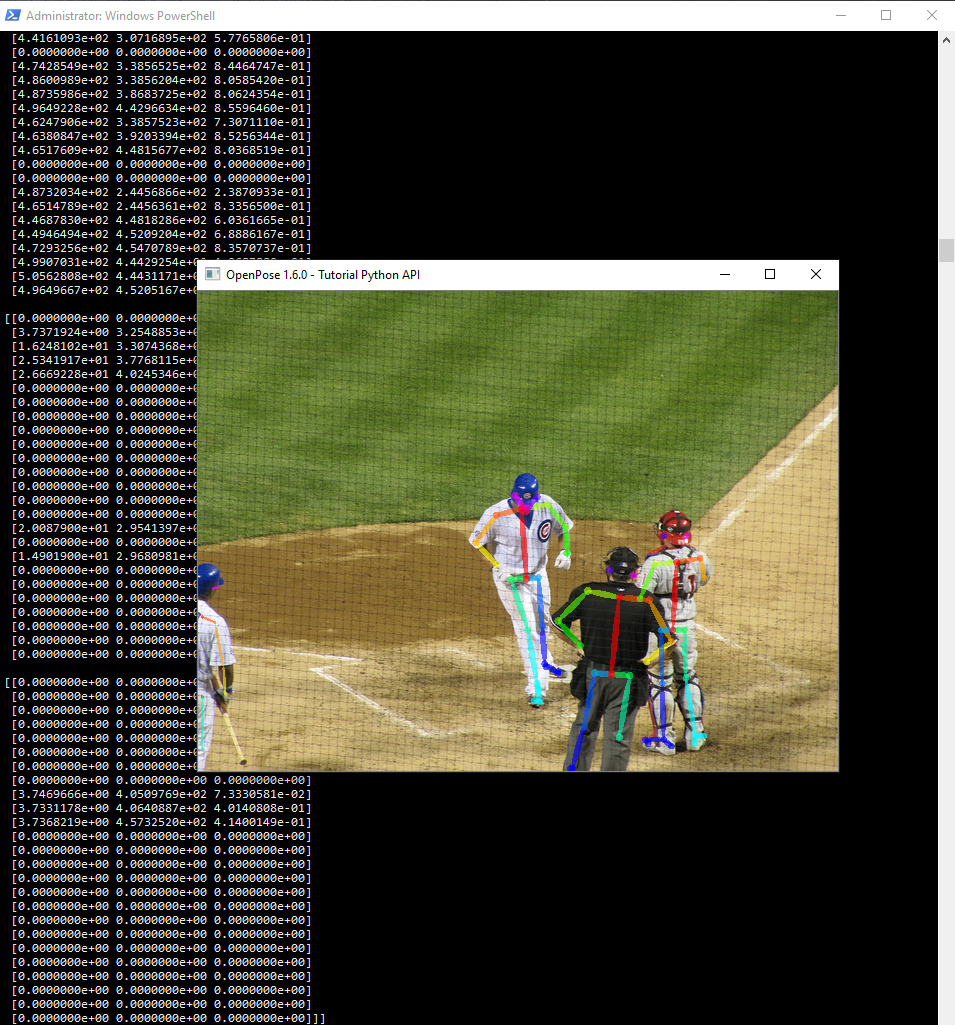
Assuming that has run without errors, we can now test the code. Back in the PowerShell, change into the build/examples/tutorial_api_python directory and run an example and hopefully see some positive output.
cd \build\examples\tutorial_api_python
python 01_body_from_image.py